learn ‘how to turn on McAfee antivirus in Windows 10‘, let’s figure out what McAfee Security is. McAfee is essential software for protecting your devices. It offers features to detect, quarantine, and remove threats instantly. It has real-time protection against viruses, malware, spyware, and ransomware.
McAfee’s real-time scanning feature monitors files alerts you to potential issues, blocks fraudulent websites, and instantly identifies threats that may steal personal information.
One of the best advantages of McAfee is that it provides round-the-clock customer support to help resolve issues or answer questions, and the built-in firewall acts as a secure barrier, filtering network traffic and preventing unauthorized access to your device and personal information.
How to Install McAfee Software for Windows 10?
Before you learn how to turn on McAfee antivirus in Windows 10, ensure the software is installed.
To install the antivirus software for Windows 10, follow these steps:
- Navigate to the McAfee protection website.
- After that, select “Get started.”
- Now, input your registered email address and a strong password to sign in to your account.
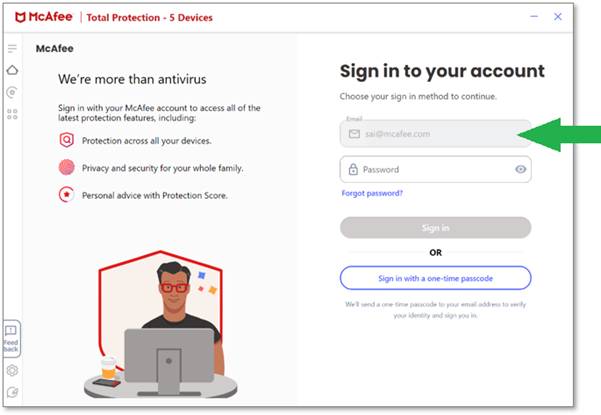
- Click “Sign in.”
- Scroll to the “Downloads & devices” section and click the “Antivirus” title.

- If you see the “Add a device you want to protect” screen, click “Download on this device.“
- After that, accept the program license agreement, then click “Agree and download” again.
- Note the serial number you might need later displayed on your screen.
- Click twice on that file to start the installation procedure.
- Click Install to start, and the installer will guide you through the installation steps.
If you’re prompted for the serial number, type it in; otherwise, that’s it. Your installation is complete. Once you’re done with the installation, McAfee will automatically install it on your device.
Additional Tips
- Check your system requirements to ensure that your system meets the system requirements for McAfee.
- Try to remove any other antivirus or Security software before installing McAfee.
- Keep your operating system up to date.
- If McAfee comes pre-installed on your PC, you must activate it using your email address and password.
Why Am I Not Able to Install McAfee on Windows 10?
Several factors could be at play if you’re having trouble installing McAfee antivirus on a Windows 10 computer.
Solution 1: Check Compatibility
- Ensure your Windows 10 version and PC specifications meet the system requirements for McAfee you’re trying to install.
- If your Windows 10 is in S mode, you might be restricted to installing apps from the Microsoft store, which McAfee typically doesn’t support.
Solution 2: Check Permission issues
- The installation might fail if your Windows account lacks administrator privileges. Temporarily enable the built-in administrator account, then log in and try installing again.
- Your firewall might be blocking the installation process. Temporarily turn off the firewall or add an exception for the McAfee installer.
Solution 3: Check Software Conflicts
- Other antivirus programs on your device might conflict with McAfee.
- Try uninstalling and disabling these temporarily.
Solution 4: Check for Virus Infection
- A virus infection could prevent the installation of new software, including McAfee. Run a full system scan with a reputable antivirus program (Besides McAfee, if possible).
- If you see an “installation incomplete” error, try running the McAfee pre-install tool to clean up temporary files and prepare your PC for installation.
Note: If you’re trying to install from the wrong McAfee account, you might see an error stating there are no programs to install. In this case, try signing out and logging in with the correct account.
How to Turn On McAfee Antivirus in Windows 10?
To turn on the antivirus program in Windows 10, follow the following steps:
Step 1: Open the McAfee Software
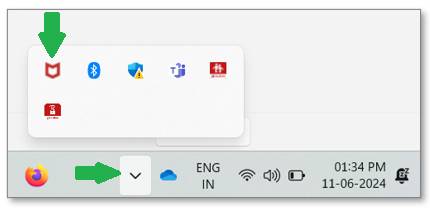
First of all, click on the search icon and search McAfee. Then, open the McAfee app.
Step 2: Navigate to the My Protection Tab
- Click on the four-dot icon and select the Real-Time Scanning option.
- Click on the Turn it on button.

Step 3: Enable Scheduled Scans
- Now again, click on the four dots and select Scheduled scans.
- Click on the Turn on button to enable Scheduled scans. You can Schedule scans by selecting timings from the Select a Schedule list.
- Then follow the same process and Select Secure apps. This feature will find and install the latest Windows software update.
- Click on the antivirus section and check if it is enabled or not.
- If any of the above options are disabled, click the button to turn them on.
- Once you’ve enabled these options, your software should actively protect your PC.
- Click the Run a Scan button to check your computer for threats.
Note: If you can’t find the McAfee icon, try restarting your PC or checking the Windows security app (search for “security” in the Start menu).
Frequently Asked Questions (FAQs)
How Do I Activate My McAfee Antivirus?
To activate your program, try these easy steps:
- First, go to mcafee.com/activate
- Next, enter your 25-digit product key or activation code.
- Now, enter your email address.
- After that, click Next to proceed.
- Perform the steps to download the McAfee software.
Why Is My McAfee Not Opening?
If your McAfee software isn’t opening, check if the necessary services run in Task Manager (Ctrl+Shift+Esc). If they aren’t running, follow the steps given below:
- Restart your computer.
- Uninstall your McAfee software completely.
- It provides a tool to prepare your system for a fresh installation.
- Run the pre-install tool and then reinstall your McAfee software again.
Where Do I Find My Activation Code for McAfee PC Optimizer?
To find your activation code for McAfee PC Optimizer, follow these steps:
- Go to protectionmcafee.com.
- After that, select “Get Started.”
- Then, sign in with your registered email ID and password.
- Select McAfee PC Optimizer from the Subscription dropdown.
- Scroll down to the Device section.
- Look for the activation code below the Device heading.